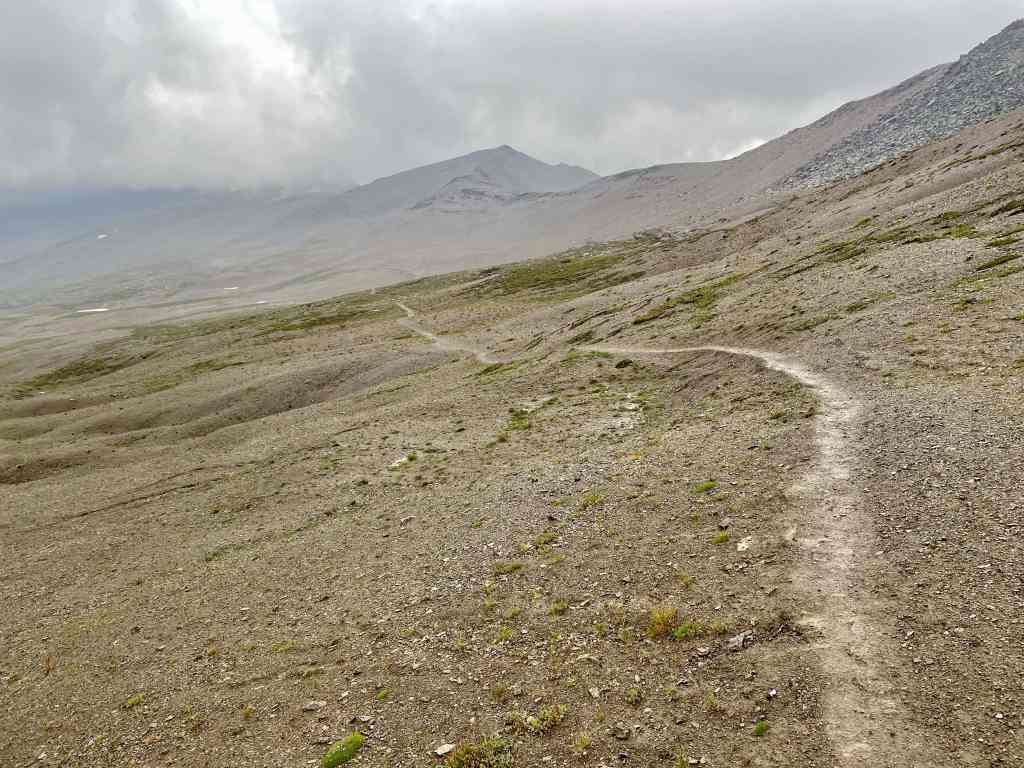
If you’re looking for a spectacular backcountry adventure, the Jasper Skyline Trail has been called one of the best hikes in the Canadian Rockies. This iconic backpacking route is nearly two-thirds above the treeline, with consistent and unparalleled mountain scenery. Skyline Trail is a must-do for those who love multi-day hiking trips. Who knows, you might just discover your new favourite Jasper hiking trail.

Last Updated: January 7, 2026
Back in August 2021, Jasper Skyline Trail claimed the rank of my longest completed solo backpacking trip. Three days of solo hiking and camping might not seem like much to some, but I was stretched out of my comfort zone with nasty weather conditions and hiking through grizzly bear territory. It was the beginning of many more solo hiking and backpacking experiences. Since then, I’ve completed the Pukaskwa Coastal Trail in Ontario, Tombstone Territorial Park in Yukon, and several others. Overall, even with obstructed views due to forest fire smoke, I would call Skyline Trail an exceptional backpacking option. I’d love to return for round two someday!
This post includes affiliate links. If you purchase through one of the links, I may receive a percentage of the sale at no extra cost to you. Thanks for your support!
Jasper Skyline Trail Map
About Jasper Skyline Trail — Hiking in the Rockies

Location: Jasper National Park, Alberta, Canada
Distance: 44.5 km point to point
Difficulty: Difficult
Elevation: 1,200 metre gain
Time: 3 – 4 days
Best Time to Hike: Late July to September
Dog-friendly: No, as this is caribou territory.
Features: Jasper Skyline Trail is a top Rocky Mountain hike with nearly 25 km above the treeline and unmatched scenery on a clear day. Along the well-maintained route, you can choose between six official backcountry campgrounds with several sites, outhouses, food storage lockers, picnic tables, and water sources nearby. For some backcountry luxury, make a reservation at Shovel Pass Lodge. No matter what you choose, the Skyline Trail hike is a must-do Jasper hiking trail for backpacking enthusiasts!
Update: Jasper Backcountry reservations will open on Wednesday, January 28, 2026 at 8:00 am MT.

Why Should You Hike Skyline Trail?

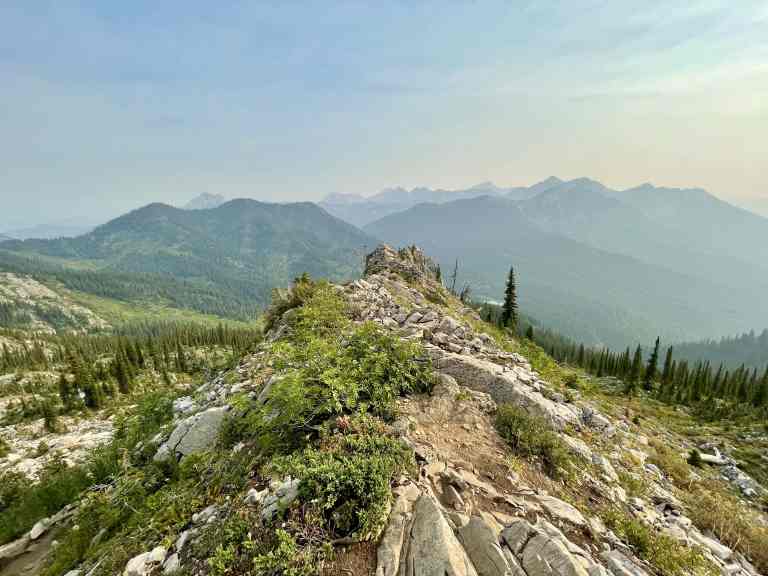
For backcountry hikers, there are many good reasons to hike Skyline Trail in Jasper National Park. First of all, it’s easily one of the most scenic trails in Jasper — and in all of Alberta, for that matter! You won’t find too many Rocky Mountain hikes that offer 25 km of views above the treeline. Secondly, Skyline Trail has an excellent reward-effort ratio, with an approximate 1,200-metre elevation gain over the course of 44.5 km. That’s very doable for most backcountry hikers over two or three days. Moreover, as one of Jasper’s most popular backpacking destinations, you’ll have other hikers around if you’re nervous about hiking alone in grizzly bear territory. Finally, the Skyline Trail has 6 official campgrounds with many itinerary options over two to four days (see below for itineraries).
Read next: The West Coast Trail: 7 Days on BC’s Most Popular Trek

Jasper Skyline Trail Reservations

To book the Skyline Trail hike, try to be ready when Parks Canada reservations open up. Reservations typically begin in January on a rolling basis, depending on the campground and type of accommodation. Skyline’s popular backcountry campgrounds, such as Snowbowl and Tekarra, tend to book months in advance. Purchase a backcountry permit and reserve individual campsites online or by calling 1-877-RESERVE (1-877-737-3783).
Did you miss your chance to book preferred dates? Don’t worry, all is not lost. Keep an eye on the Parks Canada website as cancellations do happen. You can try to find openings three days out for the Skyline Trail.

Skyline Trail Distances — Hiking in Jasper National Park

| KM | Elevation | Location | Description |
|---|---|---|---|
| 0 | 1,678 m | Maligne Lake Trailhead | |
| 4.8 | 1,824 m | Evelyn Creek Campground | 4 tent sites, throne-style outhouse, food storage lockers, picnic tables, nearby creek for water source. Small, quiet campground by a creek. Good option for hikers starting late or for a short hiking day. |
| 8.3 | 2,233 m | Little Shovel Campground | 8 tent sites, barrel-style outhouse, food storage lockers, picnic tables, water source nearby. Less crowded than Snowbowl Campground. |
| 12.2 | 2,094 m | Snowbowl Campground | 8 tent sites, barrel-style outhouse, food storage lockers, picnic tables, water source nearby. Located in a meadow sheltered by trees, with easy access to water. |
| 20.3 | 2,100 m | Shovel Pass Lodge | Backcountry lodge used exclusively for Skyline Trail. Book early to avoid disappointment. |
| 21.3 | 2,070 m | Curator Campground | 8 tent sites, barrel-style outhouse, food storage lockers, picnic tables, water source nearby. Good option for hikers with 2-day itinerary. |
| 30.9 | 2,062 m | Tekarra Campground | 8 tent sites, barrel-style outhouse, food storage lockers, picnic tables, water source nearby. Campground beside fast-moving creek. Spectacular views of Mount Tekarra. |
| 35.6 | 2,014 m | Signal Campground | 8 tent sites, barrel-style outhouse, food storage lockers, picnic tables, water source nearby. Campground at the top of Signal Fire Road. |
| 44.1 | 1,065 m | Signal Mountain Trailhead |
Finding the Jasper Skyline Trailhead

You have the choice of two trailheads for the Jasper Skyline Trail. There’s the Maligne Lake / South Trailhead and the Signal Mountain / North Trailhead near Maligne Canyon. Most hikers prefer to start at Maligne Lake and hike north on the Skyline Trail. However, you may need to hike north to south depending on campsite availability (so book early!).
Note: During my trip, I hiked from south to north. If you choose north to south, be prepared for an additional 550-metre elevation gain up the gravel Signal Mountain Fire Road. Though if you prefer the challenge of hiking more elevation, you might choose north to south on Skyline regardless of campsite options. No matter the direction, there’s plenty of elevation on Skyline!

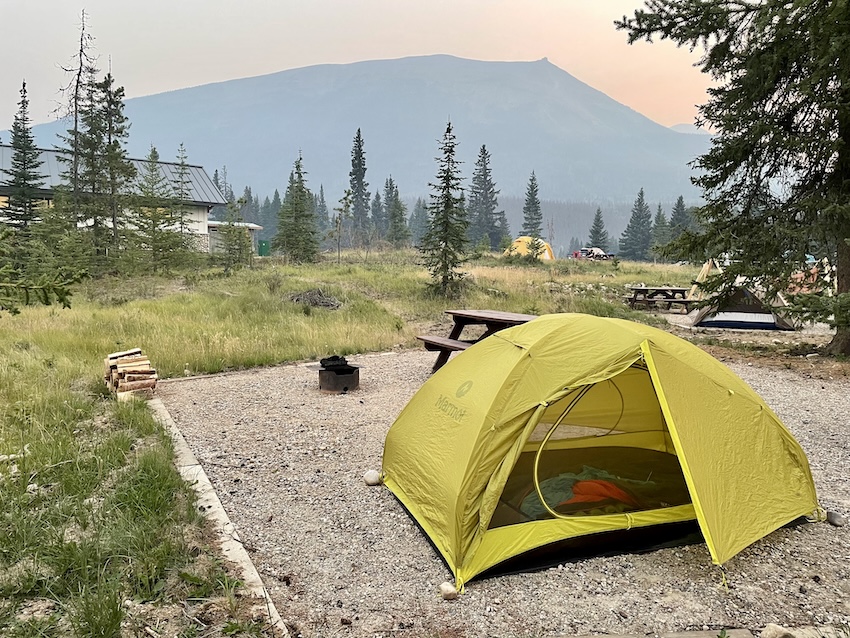
Where To Stay in Jasper (Before & After Your Hike)

There are plenty of places to stay in Jasper before or after hiking the Skyline Trail, from campgrounds to hotels and lodges. Staying in the town of Jasper makes logistics easier, with convenient access to grocery stores, restaurants, and supplies. If you’re like me, you’ll also enjoy spending some time exploring the main drag in town. Frontcountry campgrounds like Whistlers Campground offer budget-friendly options, while hotels and lodges provide a more comfortable option.
Jasper Skyline Shuttle — Maligne Adventures

Jasper Skyline Trail is a point-to-point backcountry route that requires a shuttle. If you bring just one vehicle, Maligne Adventures was the perfect shuttle option. Before starting the trek, I arrived at Signal Mountain Trailhead before 9am and caught the one-way shuttle to Maligne Lake. This 38-km drive takes about 30 minutes. If you need a ride, check out the Maligne Valley Hiker’s Shuttle for $42 per adult.
Alternatively, you could choose to park at Maligne Lake and then arrange transportation (i.e. taxi) at the end of your hike. However, be warned that cell service can be spotty. Some hikers hitch a ride from Signal Mountain to Maligne Lake (but you might wait a while…). The hiker’s shuttle was well worth the convenience of having my car waiting for me at Signal Mountain.
Read next: Maligne Canyon Hike in Jasper National Park

3-Day Skyline Trail Itinerary (+ More Options!)

Here is one of the standard 3-day itineraries for Skyline Trail, starting at Maligne Lake:
Day 1 — Maligne Lake Trailhead to Snowbowl Campground (12 KM; 4 – 5 hours)
Day 2 — Snowbowl to Tekarra Campground (12 KM; 6 – 7 hours)
Day 3 — Tekarra to Signal Mountain Trailhead (13 KM; 3 – 4 hours)
Do you want to hike a bit faster? Choose 2 days / 1 night on Skyline Trail:
Day 1 — Maligne Lake to Curator Campground (or Shovel Pass Lodge) (21 KM)
Day 2 — Curator (or Shovel Pass Lodge) to Signal Mountain Trailhead (23 KM)
Do you want to take your time? Here’s a 4-day / 3-night Skyline Trail itinerary:
Day 1 — Maligne Lake Trailhead to Little Shovel Campground (8 KM)
Day 2 — Little Shovel to Curator Campground (13 KM)
Day 3 — Curator to Tekarra Campground (10 KM)
Day 4 — Tekarra to Signal Mountain Trailhead (13 KM)
During my visit, there were a few hikers travelling from north to south. Most lamented the additional elevation gain from the Signal Mountain Fire Road. If it’s your only option, it would still be worth the adventure. Otherwise, I’d lean toward starting at Maligne Lake.
Day 1 — Maligne Lake to Snowbowl Campground (12 KM)

After a morning exploring Maligne Lake, I started the Skyline Trail hike around 12:30pm. I didn’t feel much pressure to get going right away, with a gradual and moderately challenging hiking day ahead (even with my 40 lb pack – Osprey Kestrel 68). I heard about a few hikers who abandoned their Skyline trips due to thick forest fire smoke in Jasper. On my first day, the smoke wasn’t too bad, but some of the views were limited. Even so, Lorraine Lake and Mona Lake were both worth checking out after 2 km. Tenting and campfires are not permitted at the lakes, but you can enjoy a snack by the water. I watched a loon.
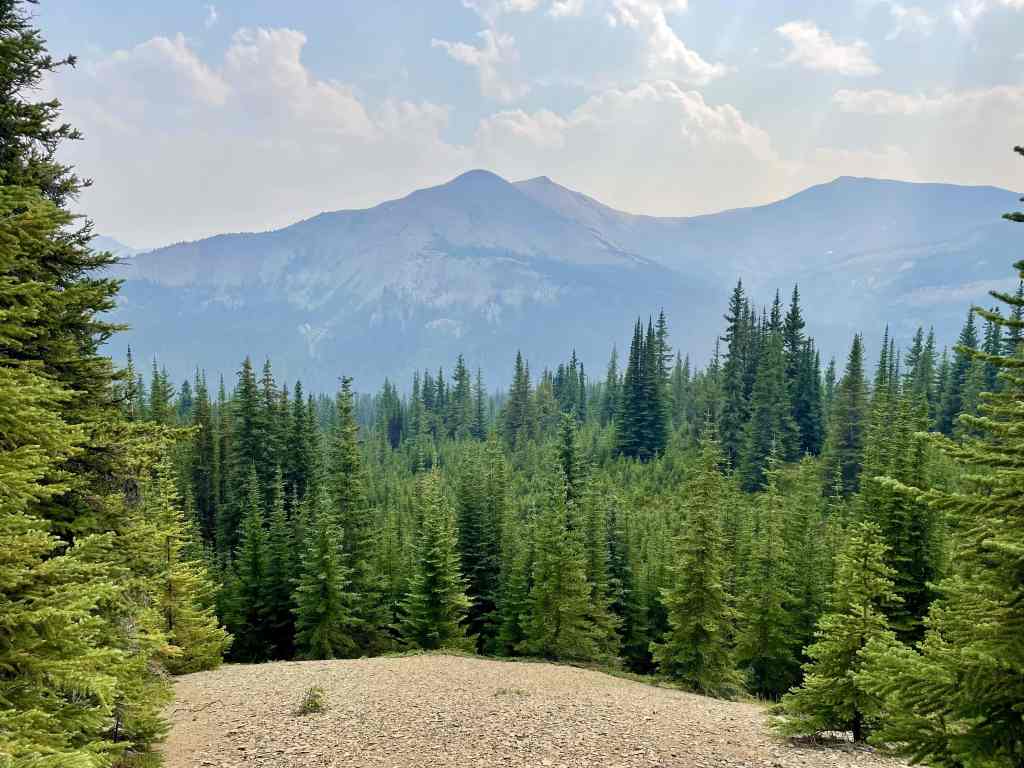
Skyline’s forested trail continues past Evelyn Creek Campground, the smallest campground along the Skyline Trail. Here you’ll find 4 campsites, picnic tables, food storage lockers, and a barrel outhouse (different from what I had seen before). A nearby creek is an excellent water source. Since this campground is only 3 km from the trailhead, it wasn’t the option I chose. Continue for another 3 km to the larger Little Shovel Campground with eight tent sites. After passing Little Shovel, Skyline Trail leaves the forest and enters marvellous subalpine tundra with mountains towering above.
After 4 hours and 12 km (and plenty of photo stops), I reached Snowbowl Campground somewhere around 4:30pm. I really liked Snowbowl for my first night due to distance from the trailhead, especially for a three-day itinerary. The better water source is about 500 metres away, but there’s a trickling stream in the campground. You can either filter from this small pool or take a short walk (if your tired legs can handle it). I used my MSR Trailshot filter. Snowbowl is full of trees to hang a tarp or hammock. Don’t forget to store your food and attractants in the lockers.
Read next: Valley of the Five Lakes Hike in Jasper, Alberta


Day 2 — Snowbowl to Tekarra Campground (19 KM)

Day two on Skyline Trail was rainy and smokey from British Columbia wildfires. In the morning, the rain stopped long enough for me to pack my tent, eat breakfast, and start hiking by 9:30am. Looking ahead, the trek from Snowbowl Campground to my next campsite at Tekarra Campground was 19 km. Day two also includes the highest point on the trail — called The Notch — about 2,511 metres (8,238 feet) high. You may want to fill your water reservoir before Big Shovel Pass, as there is no water source until closer to Tekarra.
Curator Junction was waiting for me after Big Shovel. At this junction, hikers can either head toward Curator Campground or Shovel Pass Lodge, or continue toward The Notch. I hiked along the edge of Curator Lake and then up to The Notch. Heavy rain poured down and the wind roared as I listened for thunder. Very glad I brought my rain jacket and gloves. You should not attempt the completely exposed Notch in an electrical storm.
After reaching The Notch, the hardest Skyline Trail section was behind me. I continued on the (mostly) downhill trail toward Tekarra Campground for 8.3 km. Hikers typically witness incredible 360-degree views from the ridge. Sadly, my views were obstructed due to heavy fog and rain, mixed with forest fire smoke blowing in. Following the cairns (rock piles), and yellow trail markers to stay on track, I arrived at Tekarra Campground by 3:30pm.
Read next: Your Complete Guide To Hiking North/South Kananaskis Pass


Day 3 — Tekarra to Signal Mountain Trailhead (13 KM)

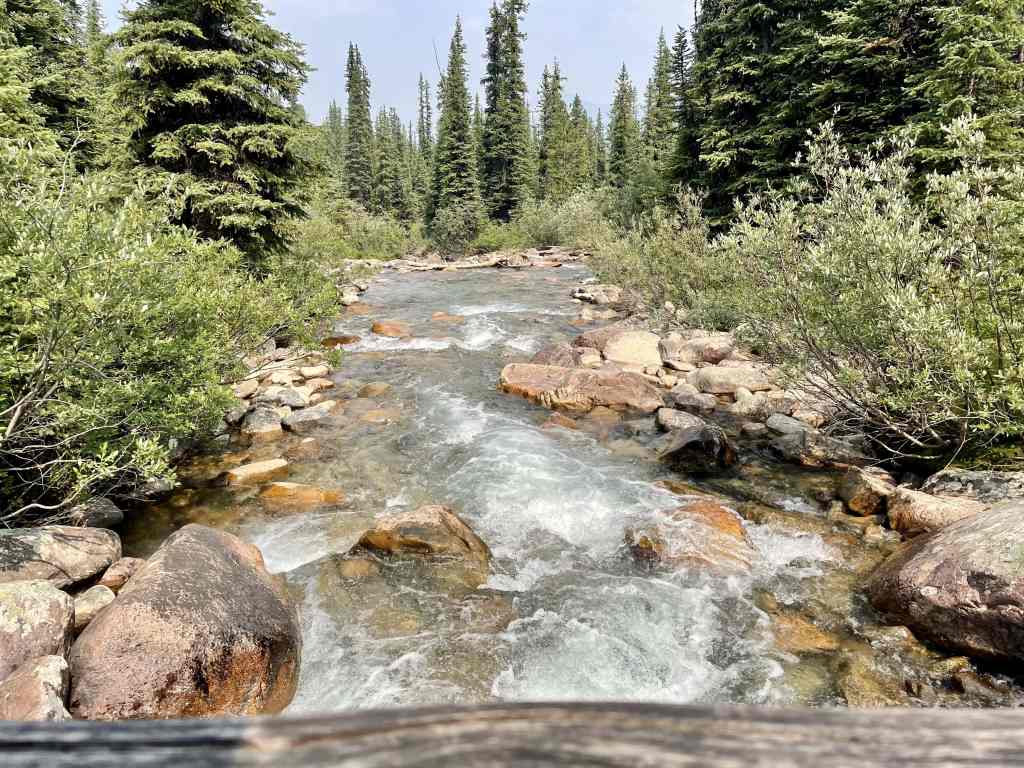
After a much-needed rest and a breakfast of instant oatmeal, I crossed the creek next to Tekarra Campground to start my third and final hiking day on Skyline Trail. Thankfully, the heavy rain was over and lush green scenery awaited. This section meanders through the forest and then opens up to sublime alpine views. On a clear day, you can see Maligne River Valley off in the distance. I started this 13-km hike around 10:15am, and took about 3 hours and 15 minutes to complete.
After I passed Signal Campground, I was on the final stretch along Signal Fire Road. You’ll hike down the gravel road for 9 km. Crossing paths with some fresh hikers and a few deer, I couldn’t wait to reach the parking area (and take off my hiking boots!). By this point, the impressive views are long gone. I was very glad to see my car in the Signal Mountain Trailhead parking lot.


Comfort Camping — Shovel Pass Lodge

If you want to take a break from your tent, Shovel Pass Lodge is the only backcountry lodge on Skyline Trail, near Curator Campground. This backcountry comfort camping facility includes the main lodge and 7 individual cabins, plus delicious meals like dinner and the next day’s breakfast and packed lunch. It’s possible to do the Skyline Trail hike in two days and stay overnight at Shovel Pass Lodge. Not a bad option, eh?
Read next: Tent Ridge Hike: One of the Best Hikes in Kananaskis

Jasper Skyline Trail Packing List
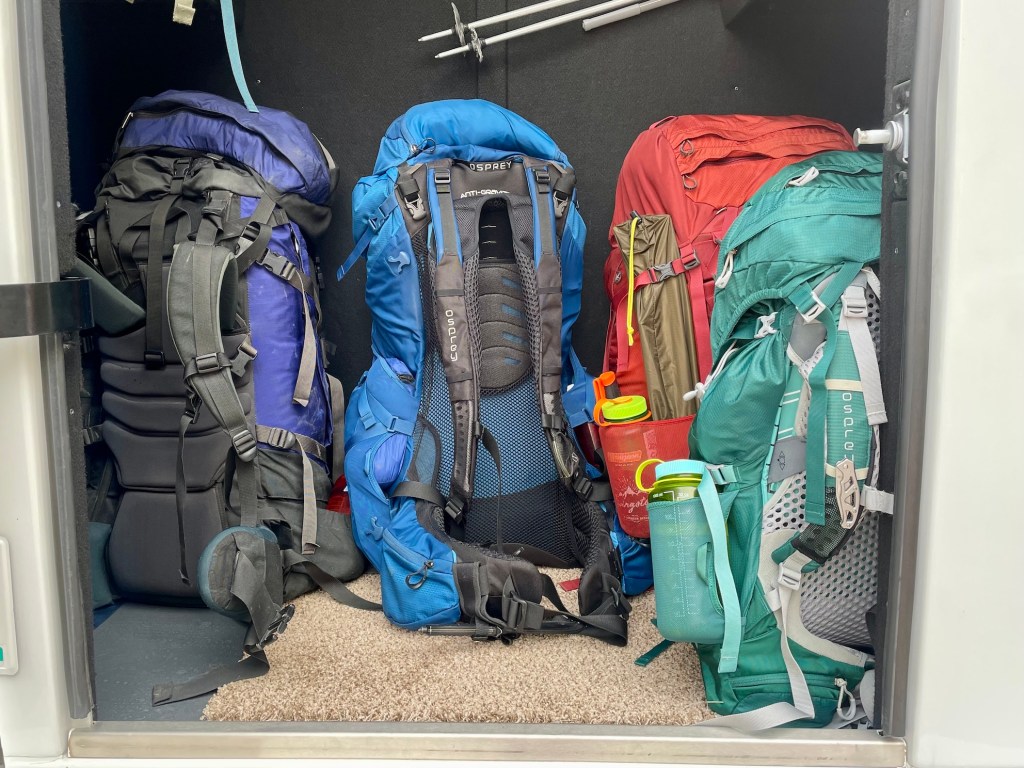
Here is my packing list for the Jasper Skyline Trail:
- Osprey Kestrel 68
- Waterproof pack cover
- Tent
- MEC Talon sleeping bag
- Therm-a-rest NeoAir
- Sleeping bag liner
- Siltarp
- Camp shoes
- Scarpa hiking boots
- Arc’teryx Beta LT rain shell
- Rain pants
- OR Rocky Mountain High Gaiters
- Jetboil Flash
- Stove fuel
- Campsuds soap
- Osprey 2L reservoir
- Nalgene water bottle
- Komperdell hiking poles
- Lighter / matches
- GSI mug
- Spoon
- Sunscreen
- Sunglasses
- Bug spray
- Toilet paper
- Towel
- Toothbrush / toothpaste
- MSR TrailShot filter
- Headlamp
- Paracord
- Buff
- Mora Knife
- First aid kit
- Leukotape (for blisters)
- 2 merino wool t-shirts
- 1 long sleeve (love this Patagonia Capilene)
- 1 pair of pants
- 2 pairs of shorts (1 for hiking; 1 for camp)
- 1 pair of merino leggings
- 3 pairs of merino underwear (1 for hiking; 1 for camp; 1 extra)
- 2-3 pairs of merino socks (1 for hiking; 1 for camp; 1 extra)
- Down jacket (love this Patagonia down sweater jacket)
- Warm hat and gloves
- Map / compass
- Satellite comms (Zoleo)
- Powerbank
- Camera
- Food
- Parks Canada pass
- Bear spray

Jasper Backcountry Camping Food Storage

Food storage lockers are found at every backcountry campground on the Skyline Trail. Never store food or other animal attractants (like garbage) in your tent. There should be plenty of space to store your meals in the lockers. When I’m in the backcountry, I like to pack my food in an ultralight dry bag for protection from the elements and to keep everything together.
Read next: 2-Day Goat Lake Hike and Avion Ridge in Waterton Park

Jasper Backcountry Camping Toilets

On the Jasper Skyline Trail, each backcountry campground is equipped with composting barrel toilets. However, these outhouses don’t create the type of privacy that some hikers might expect. Be courteous to your fellow backpackers. Snowbowl Campground had a short board to place across the trail when the toilets were in use.
If nature calls outside of the campgrounds, please follow Leave No Trace principles and dig a hole at least 70 metres away from the trail, campgrounds, or water sources. Catholes should be about 12 to 16 centimetres deep and loosely buried when finished. Don’t use too much toilet paper and bury in the cathole or pack out.

Jasper Skyline Trail Wildlife

Skyline Trail is full of wildlife, and I saw (many!) hoary marmots, gophers, and a loon. Toward the end, I came across a few deer and saw signs of elk. Some hikers come across caribou on the Skyline Trail, too. As you may know, Jasper National Park is grizzly bear territory. I saw a large black bear on the Icefields Parkway on my way to Jasper but didn’t encounter any bears on Skyline. If you encounter wildlife, keep a respectful distance and carry bear spray and know how to use it. Learn more about hiking with bears before you go.
Read next: Mount Yamnuska Hike Near Canmore, Alberta

Know Before You Go — Jasper Skyline Hike

Jasper National Park Pass: Don’t forget your Parks Canada Discovery Pass or day pass. Purchase your season pass online or in the park.
Fires: Fires are not permitted in any of the backcountry campgrounds or anywhere along the Jasper Skyline Trail.
Dogs: Dogs are not permitted on the Skyline Trail as this is a caribou range.
Bikes: Bikes are not permitted on the trails between Maligne Lake and the Signal Mountain Fire Road.
Leave No Trace: If you pack it in, you’ll need to pack it out (including garbage and organic food waste like orange peels). Do not leave anything behind in the backcountry.
Stay on the Trail: Limit your impact on the environment by staying on the well-marked trails. Don’t take shortcuts and reduce the risk of trail braiding.
Emergency Route: If there’s poor weather or The Notch is impassible, the Wabasso Trail is a rough 15-km route that leads from Curator Campground to the Icefields Parkway. Be prepared for a steep descent of 1,100 metres. There is cell reception at the Wabasso Trailhead.
Note: The best time to hike Skyline Trail is late July until the end of September. If you attempt the trip too early, you’ll likely be post-holing through snow at The Notch. This is one of the reasons why Skyline can be difficult to book. This incredibly popular trail has a very short hiking season.

Have you experienced the Skyline Trail hike in Jasper National Park? What was your experience like? Let me know in the comments below!
Save this for later? Hover over the image to add to Pinterest 👇

Thomas Coldwell has always been fond of the outdoors. He loves hiking, paddling, and camping, and thoroughly enjoys creating outdoor adventure resources for people like you. Originally from Nova Scotia, Thomas has lived in four Canadian provinces (NS, NB, ON, AB) and has travelled in 20 countries and counting.